UK
UK FR
FR DE
DE IT
IT ES
ES
GUITAR SKIN INSTALLATION ON THE BODY FRONT
This user guide is specifically designed for the installation of a Guitar skin on the front of the guitar body. This method offers a straightforward approach to installing a guitar skin, and we recommend it, especially if you are using guitar vinyl for the first time. Please be aware that these installation instructions are tailored to our specific guitar skin products. If you have purchased a guitar skin from another source, the process may vary slightly, as the size or quality could differ (for example, you may not receive a film protection if purchased elsewhere).
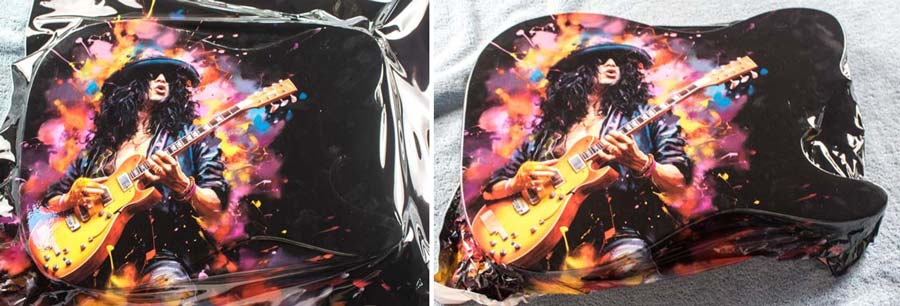
The Guitar Fabric’s Guitar Skins
Our skins are made from high-quality vinyl, featuring excellent stretchability and high-quality image. It also has a protective film layer. We advise to remove the protective layer once the skin is installed. The protective layer not only protects your guitar skin, it also:
- protects your vinyl during during transportation and prior to installation.
- facilitates the installation process, especially when wrapping the front and sides of your guitar body. Although stretching with the protective film can be a bit more challenging at times, it also minimizes the shrinkage effect.
Protective layer film on the guitar skin (to be removed once skin installed on the guitar body)
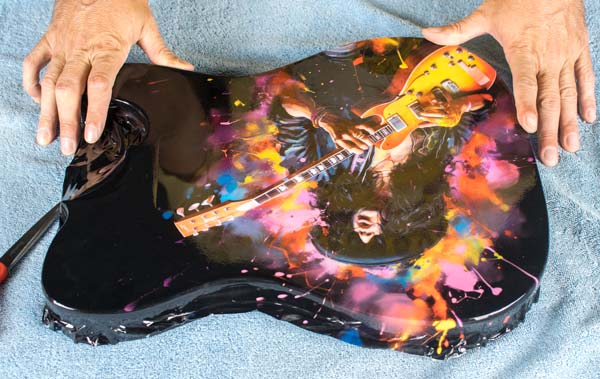
Work Environment & Required Tools
Ensure you have a clean environment for installing your guitar skin. Use a smooth surface to prevent any damage to your guitar body or skin; a towel, for instance, will suffice. Keep in mind that wood is fragile, so handle your guitar body with caution.
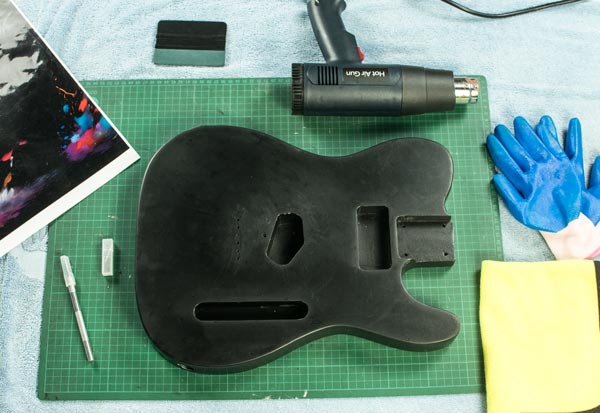
Typical working environment to install a guitar skin
You'll also need a few common household tools, which you may already have or can easily find at a store.

The utilization of these various tools during the installation of a guitar skin on the front of a guitar body is discussed in the following sections.
Body Preparation
Preparing the body for skin installation depends on the initial state of your guitar body, which typically falls into two categories:
You install your guitar skin on an existing electric guitar: When installing your guitar skin on an existing electric guitar, it is advisable to remove all hardware parts and work on a blank body for the best results. If your guitar has a bolt-on neck, it's recommended to remove it. In the case of a glued neck, the installation process is quite similar, just simpler to execute without the neck. Nevertheless, it is still possible to install the skin without removing hardware or the neck. The method for installing a guitar skin on a complete electric guitar without removing parts and the neck will be discussed in a separate article.
Disassembly of the components of your electric guitar before installing the guitar skin.
You install your guitar skin on a raw guitar body: When installing your guitar skin on a raw guitar body, whether you are using a guitar kit or have a second-hand body without any finishing, some initial preparation may be necessary. Typically, on a raw guitar body, we recommend the following:
- Sand your body to P400.
- Apply one grain filler coat if you have an open-pore wood body, such as mahogany or ash, and sand it to P600.
- 1 Spray Aerosol of sealer lacquer paint or varnish coat is then sufficient to create a clean surface for installing your guitar skin.
Whether you start with a raw body or begin with an existing electric guitar, the objective is to achieve a smooth body. This ensures that your skin adheres well to the guitar during installation and helps avoid imperfections (such as scratches on the guitar body that may still be visible after installing the skin).
Position Your Guitar Skin
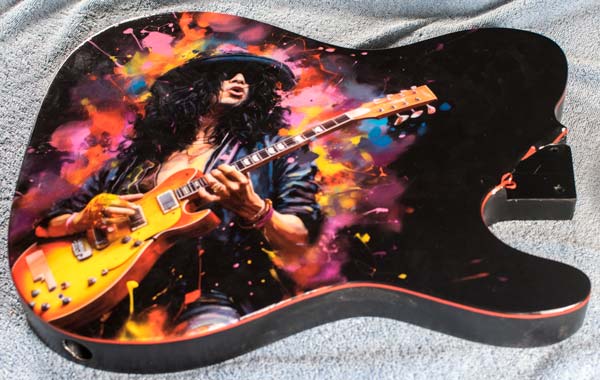
As advertised on our product pages, the size of our guitar skin enables you to install it in various ways. When installing the skin on the front only, you have flexibility in positioning your guitar vinyl. Place it on your guitar body and assess the optimal installation orientation. If you also intend to cover the headstock, consider positioning it in a way that provides sufficient surface area on one side of the skin for your guitar headstock.
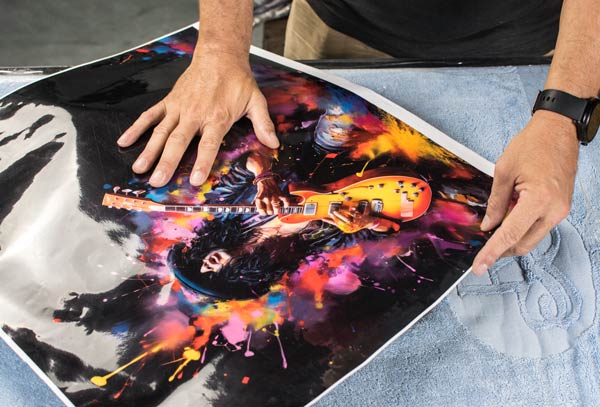
Looking to position the guitar skin on a telecaster body
Once you have determined the desired installation orientation, place your skin on your working surface, and position your guitar body on top. Trace the contour of the body onto the protective film layer using a felt-tip pen. Keep in mind that this contour will be removed later when you peel off the protective layer. This step helps guide the precise application of the skin onto the guitar body, ensuring an accurate and well-fitted installation.
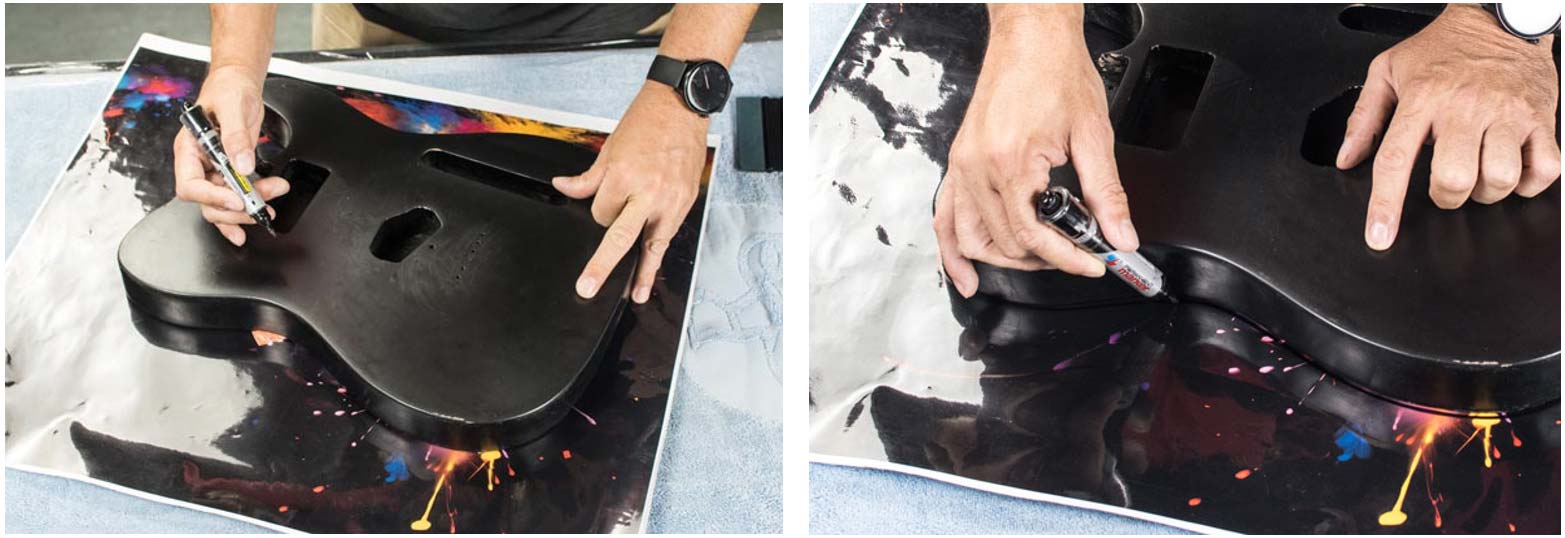
Final check of skin positioning and drawing the contour of the telecaster body with felt-tip pen
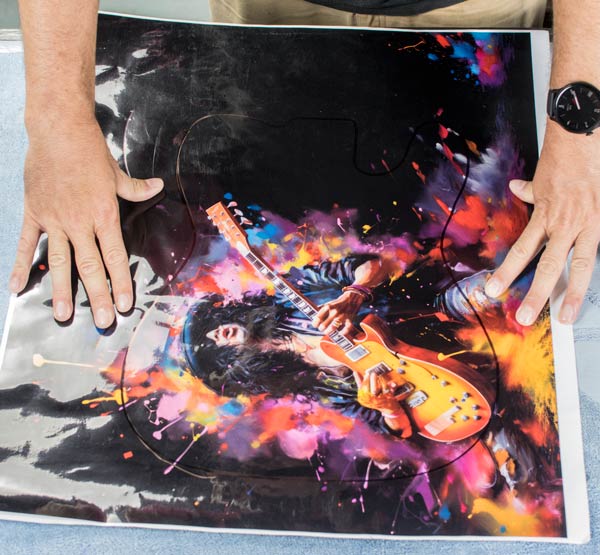
Contour drawn
The Various Guitar Skin Cutting Options
The cutting process, while still relatively easy, is often considered the most challenging part of the installation. Unlike the installation phase, where adjustments can be made, cutting requires careful precision, and multiple attempts may not be feasible. Our product development team has extensively tested various methods to offer our users the most optimal and user-friendly solution. Here are the existing options:
- Use of a scalpel or razor:
- After installing the guitar skin, place your body on its front and cut on the table following the contour.
- Adjust by cutting on your body.
- While this method is simple and yields good results, the main drawback is that adjusting the cut may slightly damage your guitar body.
- Use a knifeless tape:
- This special tape contains a wire. First, use the tape to outline the contour of the front of the body.
- Install your guitar wrap on your guitar body.
- Remove the wire inside the tape to cut the contour.
- Although effective once mastered, this method requires purchasing a specific product and mastering your skills. Our product development team needed about eight tests to fully master it, so we don't recommend it, especially for those unfamiliar with knifeless tape.
- Use tapes with a scalpel:
- Before installing your guitar vinyl, apply some resistant tape around the border of the guitar body front to protect it during cutting.
- Put on your skin and then add another tape to guide you during the cut with a razor blade.
- Cut and remove the various tapes.
- This is our preferred method, providing perfect results. It is considered the easiest way that anyone can successfully use the first time a guitar skin is applied.
In the next section, we will focus on what The Guitar Fabric experts have identified as the best solution for installing a guitar skin using tapes and a razor or scalpel.
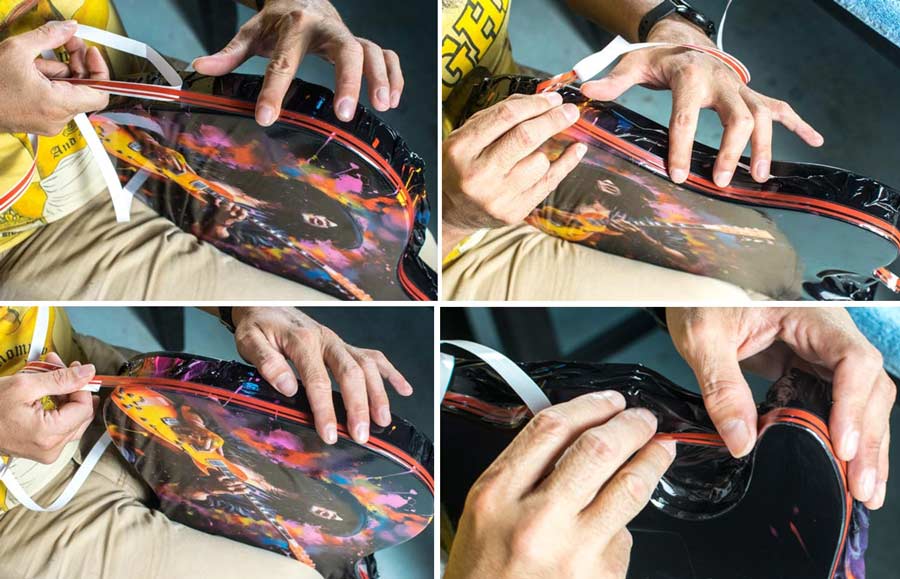
Installing the Tape to Protect the Cut
In the final steps of installing a guitar vinyl, the last task is to cut the skin to fit the front of the guitar body, and there are various methods for this, as discussed earlier. Our preferred method involves protecting the guitar body with tape before making the cut. From our tests, we found that electrical cable tape, readily available in most stores, works well for this purpose. We recommend applying two layers of electrical tape to achieve optimal protection during the cutting process. To install the tape, we find it effective to place the body between your legs and slowly follow the contour of the side of the body as closely as possible to the edge of the front of the body. This ensures a clean and precise protective layer for the cutting stage.

Installing 2 layers of tape on the contour on the edge of the side of the body
Installing the Guitar Skin on the Front of the Body
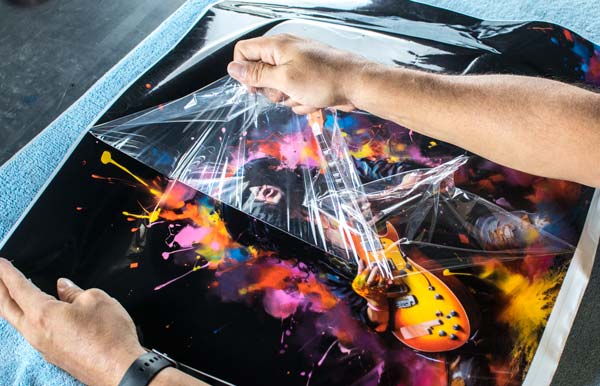
Place the skin on the body to align it with the contour you have drawn. Peel back a portion of the adhesive layer and fold it over, leaving only the section ready to adhere to the back of the guitar body.

Removing a part of the adhesive to prepare the installation of the guitar wrap
Following the contour you've drawn, begin installing the skin from the bottom and gradually move towards the center. Utilize a squeegee (maroufle) to eliminate any bubbles that may appear. If bubbles do form, don't hesitate to lift the vinyl until reaching the location of the bubbles and readjust it. Our guitar vinyls feature a robust adhesive, allowing you to remove and reapply them several times without compromising adhesiveness.
Installation of the skin until reaching the first part where you have removed the adhesive layer
Once you've reached the first section of the adhesive removal, continue to smooth out the skin while slowly peeling off the remaining adhesive. If you don't have a squeegee, you can use a plastic card, like a credit card, wrapped in a cloth to avoid damaging the skin.
Application of the guitar skin until full removal of the adhesive layer
Perform a final check to ensure that no bubbles appear on the surface of the body during the guitar wrap application. The most effective way is to scrutinize the surface closely from an angle that reveals any imperfections.

Look the guitar body on the side to find any imperfection bubble and readjust if needed
Removing the Protective Layer
As discussed further in the next section, we advise the following:
- If you plan to use a hair dryer later to set the guitar skin, remove the protective layer now.
- If you plan to use a heat gun later, remove the protective layer after applying heat to affix the skin to the guitar body.
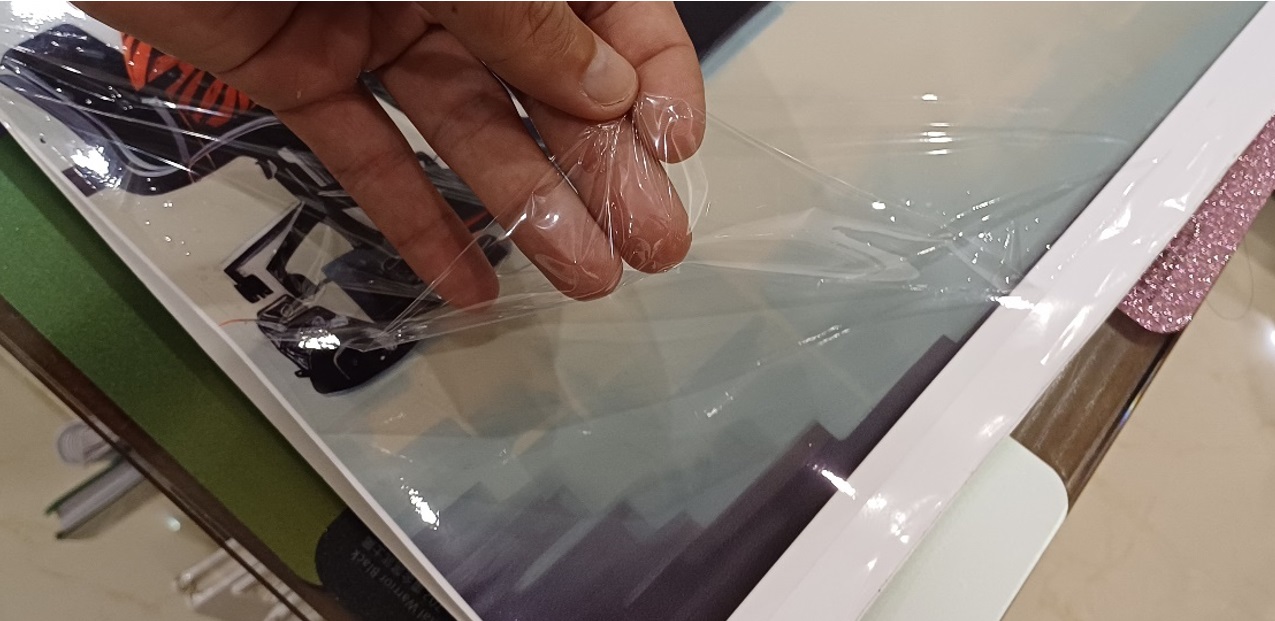
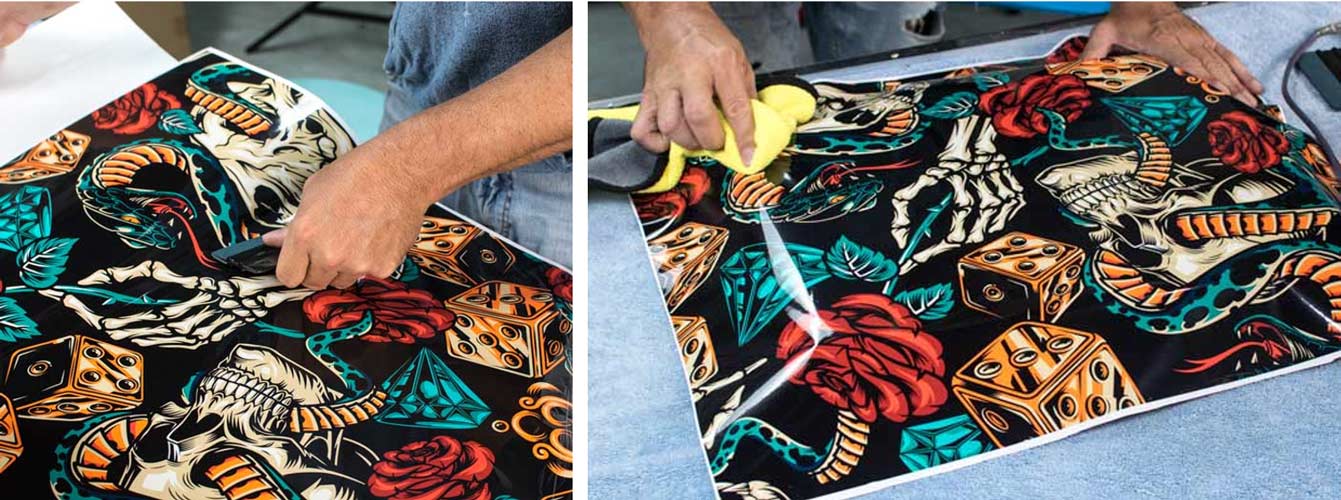
In this case, assuming you are using a hair dryer, it is best to remove the protective layer now. The protective layer is securely attached. The most effective method is to peel it off from the side. Roll your finger along various sides of the guitar skin until the plastic film detaches.
Removing the protective film layer of the guitar skin
Comments: Once the protective layer and the adhesive layer are removed, what remains is the skin. The skin itself is, in fact, covered by a gloss laminated layer that is fully attached. Therefore, it should not be possible to remove it. However, when you start to peel off the protective layer, check the appearance of the vinyl skin. If it appears matte instead of glossy, it indicates that you may have somehow removed the gloss laminated layer. In this case, start peeling from another section to remove the protective film.
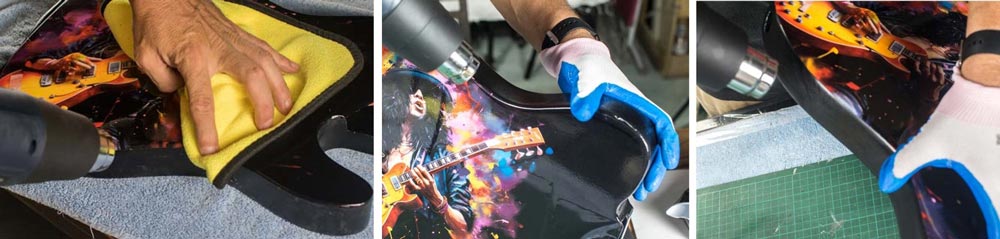
Use Hair Dryer or Heat Gun to Fix Your Guitar Skin
Use a hair dryer or a heat gun on the front of the guitar while passing your maroufle over the skin. This will help the skin adhere better and fully merge with the guitar. Apply the hair dryer to the sides of the body as well, allowing the skin to conform to the shape of the guitar. Ensure that the skin is installed sufficiently on the sides so that you can later apply another tape, as demonstrated in the next section, to assist you during the cutting process.
Using a hair dryer will take a bit more time for the guitar skin to fully conform to the guitar body. You might need to stretch the skin a bit on the guitar side. Don't worry—our guitar skin is easily stretchable, and the temperature of a hair dryer is not strong enough to cause tearing.
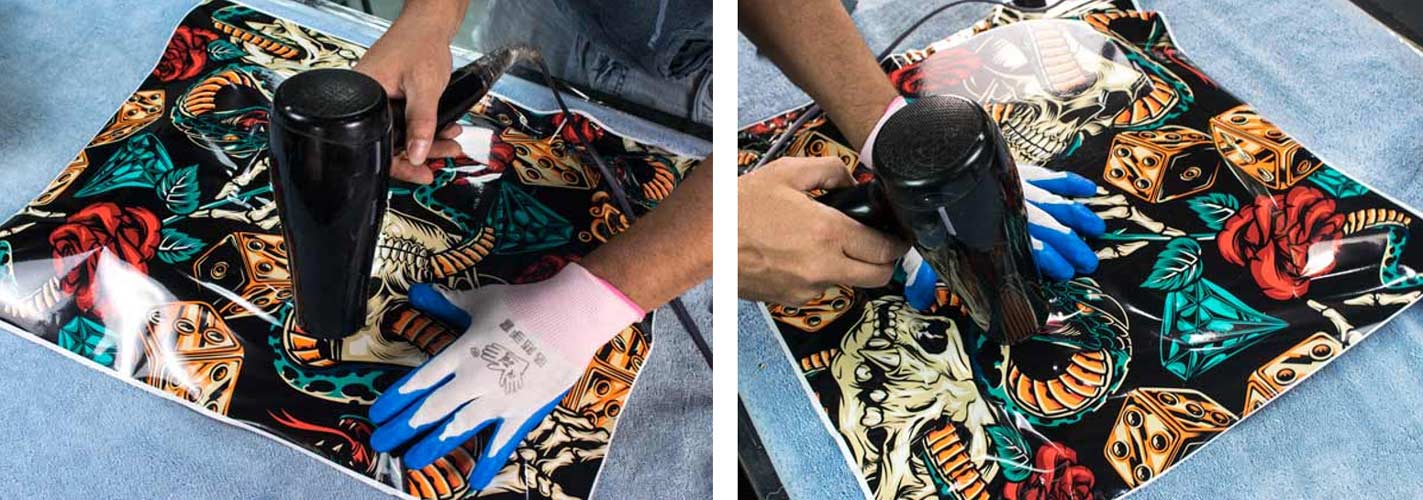
Using a hair dry to fix the skin on the front and contour of the guitar body
If you are using a heat gun, as mentioned in the previous section, it is advisable to keep the protective film layer, especially if it is your first time installing a guitar skin. A heat gun is significantly more powerful, and if you apply too much heat too closely or for too long at the same spot without the added protection of the film layer, it might cause the skin to tear off. A heat gun generates intense heat, and prolonged exposure without the protective film layer can potentially melt the skin.
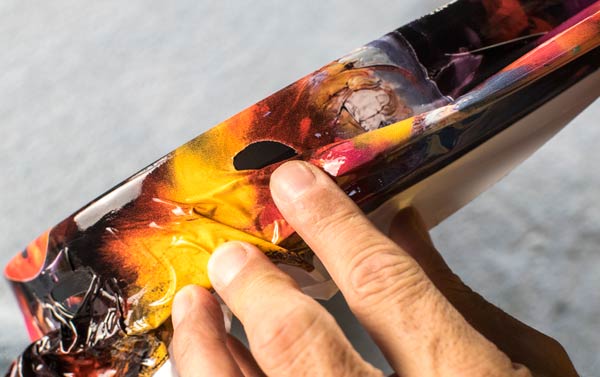
Skin without plastic film protection layer tear off when heat with the heat gun
Even if you follow our guidance and don't set the heat gun to full power, it will still be easier and faster to conform the skin to the contour of the body's edge. Below is a comparison when applying heat in a similar way to a guitar skin using a heat gun and using a hair dryer.
Results comparison when heat with a hair dryer (left) and with a heat gun (right)
Finally we advise to cut the side of the guitar vinyl for convenience.

Results comparison when heat with a hair dryer (left) and with a heat gun
Whether you have used a hair dryer or a heat gun to conform to the contour, at this stage, you should have something like this.
Guitar skin installed and prepared for the cut
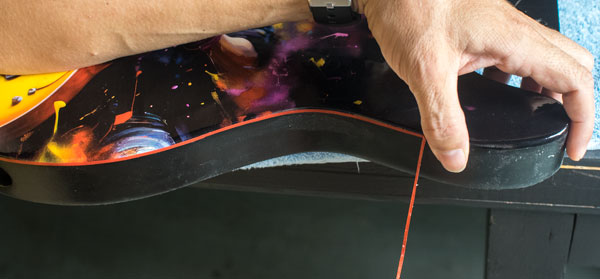
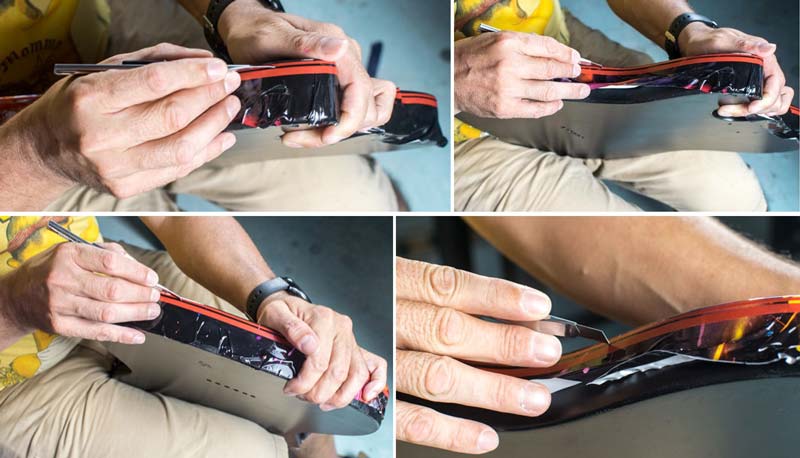
Installing Tape for Cutting Accuracy
The next step is to install a tape that will guide us during the cut to ensure a straight line. As during the installation of the tape to avoid cutting on the body, the best position for us is to place the guitar body between our legs. Later on, the cut will be done following one of the edges of the tape. So, before installing this tape, think about where you want to make your cut. Note that being too close to the edge of the body can make the cut a bit more challenging, and being too far away may, in our opinion, not look as good as a cut close to the front of the body.
Installing another tape that help to cut straight the guitar skin and get a clean integration of the guitar wrap
The tape we are using is a bit special as it has an adhesive film layer that we need to remove. However, standard masking tape works well too. In our case study here, we also remove the adhesive layer.

Removing a adhesive, only related to our specific tape we are using
You should have now the tape doing the full contour of your guitar body close to the edge.
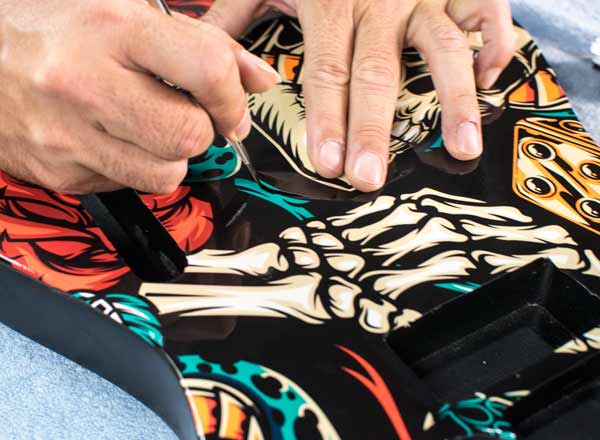
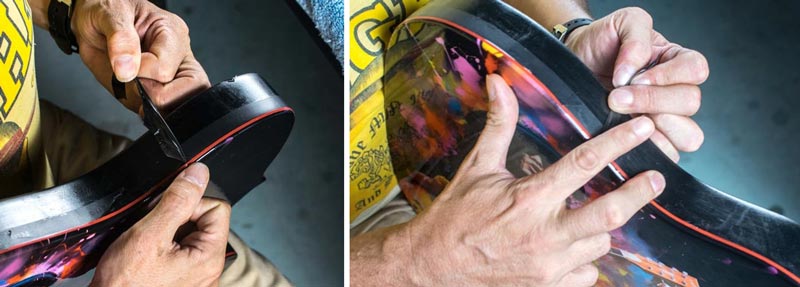
Cutting the Installed Guitar Skin
The cutting part might be the most challenging as you won't have another chance. However, if you have followed our previous guidelines carefully, it should be straightforward. Just take your time.
In terms of positioning, continue with the guitar body between your legs, rotating it when you start to feel uncomfortable during the cut. The key is always to put yourself in a comfortable position when cutting.
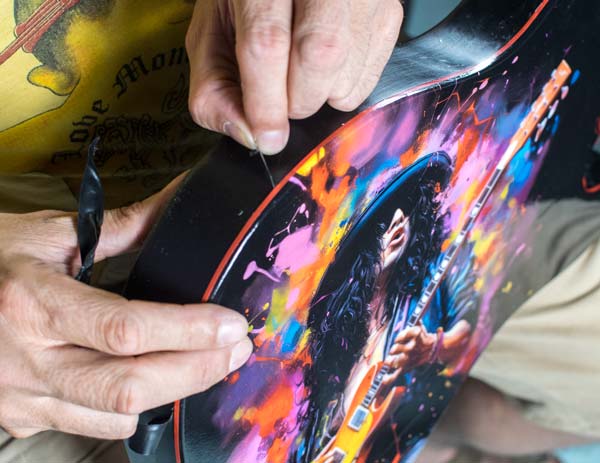
Start the cut at the easiest location where the body curve is straighter. Cut along the edge of the previously installed tape. When cutting, don't hesitate to stop and reposition the body and yourself to be in your best possible position. Cut the contour slowly using a brand-new razor blade. The more parallel the blade is to the surface and follows the surface curve, the better. Don't hesitate to apply some pressure; the double layer of tape you initially put will protect your guitar body. If you're unsure about the pressure to apply, you can do some tests with leftover guitar skin. Install a double layer of tape and a skin on raw wood, for instance, and cut it to better estimate the right amount of pressure.
Cutting the guitar skin installed on Telecaster guitar following tape
Removing the Guitar Skin Cut Part
Remove the guitar skin you cut. When removing make sure to let the protective adhesive tape in place as you might not cut it. The protective tape will be removed afterward. So remove only the skin layer.
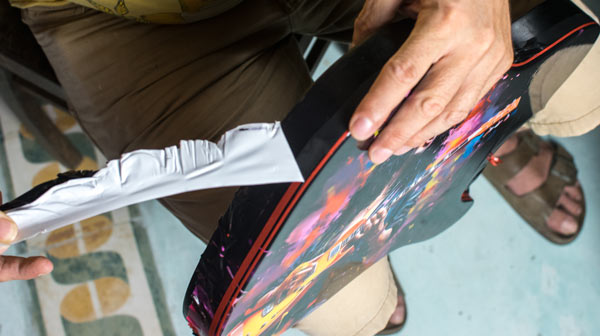
Removal of the skin layer that has been cut on a Telecaster body
In case you have some place you have not cut your guitar vinyl deep enough you can readjust easily by cutting again.
Doing some final adjustment of the cut
Once the skin is completely removed, thoroughly check to ensure it is perfect everywhere. The protective tape is still in place, allowing you to make slight adjustments to your cut if needed.
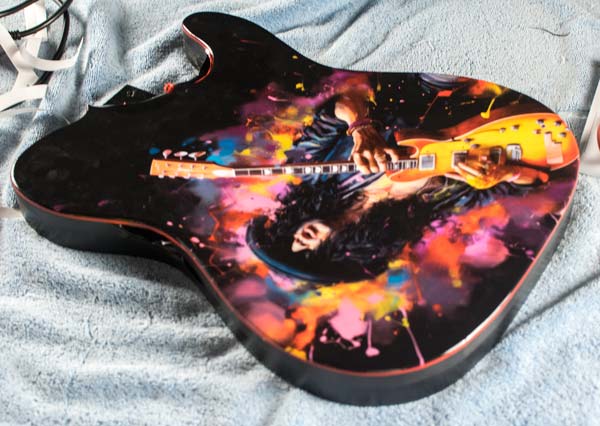
Skin side fully removed keeping only the skin install on the front
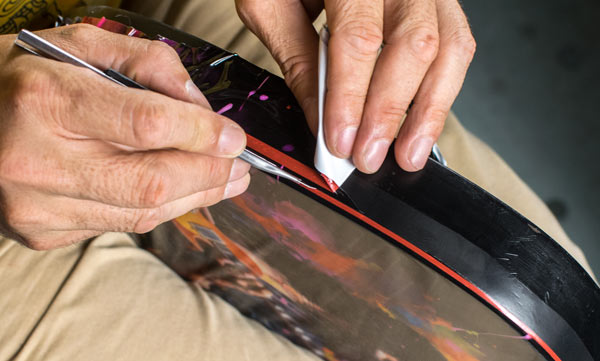
Removing the Protective Tape
Now remove the protective tape. Remove both layers in one go. To do this, pull it perpendicular to the body side, as shown in the picture, to avoid the skin from detaching from the body. Some of the tape is underneath the skin, so this method ensures a clean removal.
Remove Protective Tape underneath the guitar skin
You might have some residual tape underneath the guitar skin. In that case, gently scratch it and grab it to remove those as well.
Removing some final protective tape residual under the guitar wrap
Removing the Guiding Tape
Remove the guiding tape slowly, and use your finger to ensure you don't detach the skin while pulling the tape. If necessary, remove any excess glue.